Quick start
This guide will walk you through installing and running your local LeanEngine Server and get you started with mobile client development by running an example Android project. For more details, please see the detailed Android, iOS or Server documentation.Server installing and running
- Using Git and Maven (recommended)
- Using an Eclipse project
Install using git and Maven (recommended)
    git clone git://github.com/leanengine/LeanEngine-Server.git
    cd LeanEngine-Server
    mvn clean install package
    cd lean-server-example
    mvn gae:execute
At this point the server should be running. Check your Maven output or point your browser to: http://localhost:8080/.
Install using an Eclipse project
Important You need Eclipse with Google plugin for Eclipse installed.
Download the LeanEngine Server for Eclipse from Github.
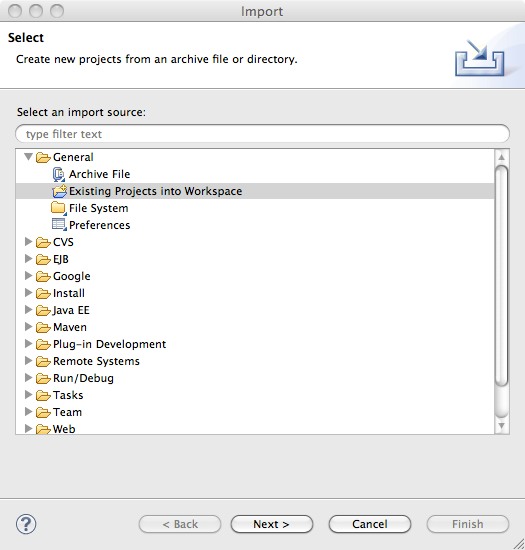
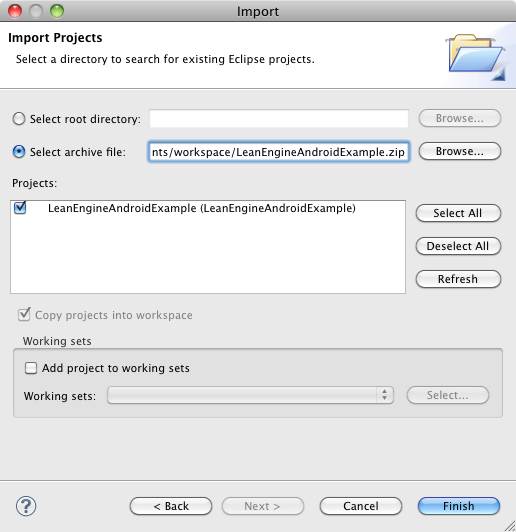
Import the downloaded project to Eclipse. You do this by clicking File/Import... and selecting the Existing Projects into Workspace option.
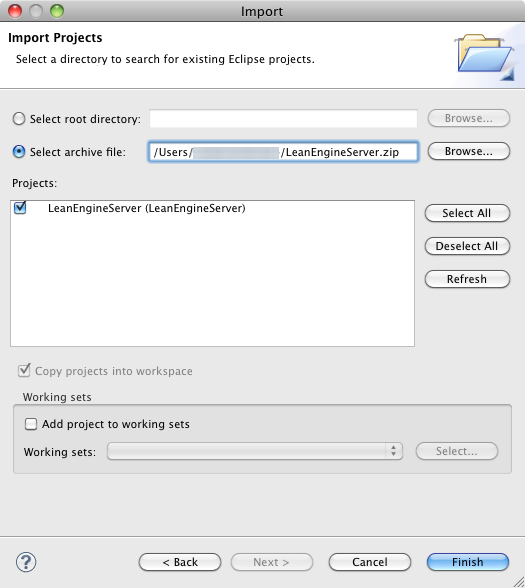
In the next dialog go to Select archive file: and point it to the file you have downloaded in the previous step.
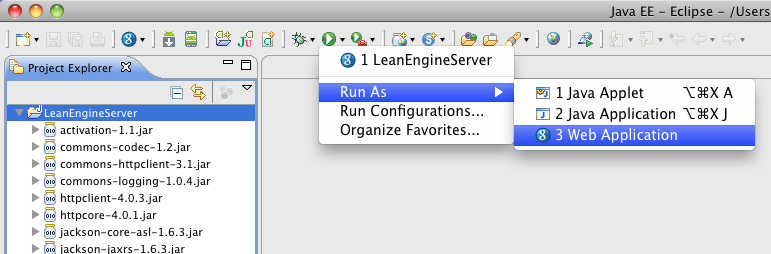
You are ready to run your server now. Just click on the green Run icon and select LeanEngineServer or choose Run As... / Web Application.
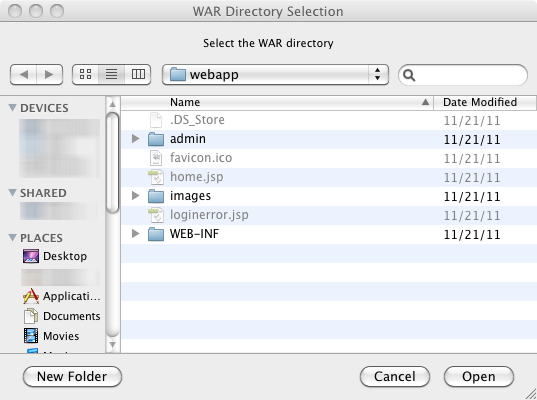
In case Eclipse asks you to Select WAR Directory just point it to the webapp folder.
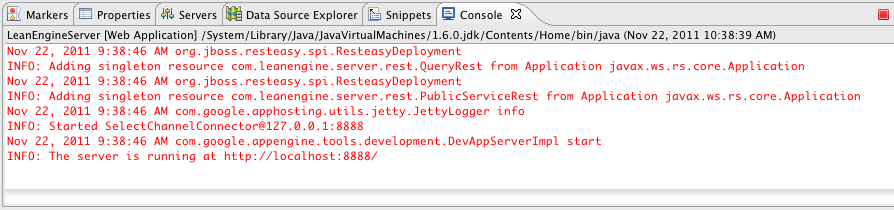
If everything went well you should see something like this in the console in Eclipse.
Android example project
- Using Git and Maven (recommended)
- Using an Eclipse project
Run using git and Maven (recommended)
    git clone git://github.com/leanengine/LeanEngine-Android.git
    cd LeanEngine-Android
    mvn clean install package
Run with Eclipse
Important You need Eclipse with ADT plugin for Eclipse installed.
Download the LeanEngine Android example for Eclipse from Github.
Import the downloaded project to Eclipse. You do this by clicking File/Import... and selecting the Existing Projects into Workspace option.
In the next dialog go to Select archive file: and point it to the file you have downloaded in the previous step.
You are ready to run your Android project. Just click on the green Run icon and select Run As... / Android Application. If all went well the emulator should start now.
Deploying your server uploading your server to Google App Engine
Once you are finished with the development process it is time to deploy your server - upload it to the Google App Engine. The process for uploading is described here.
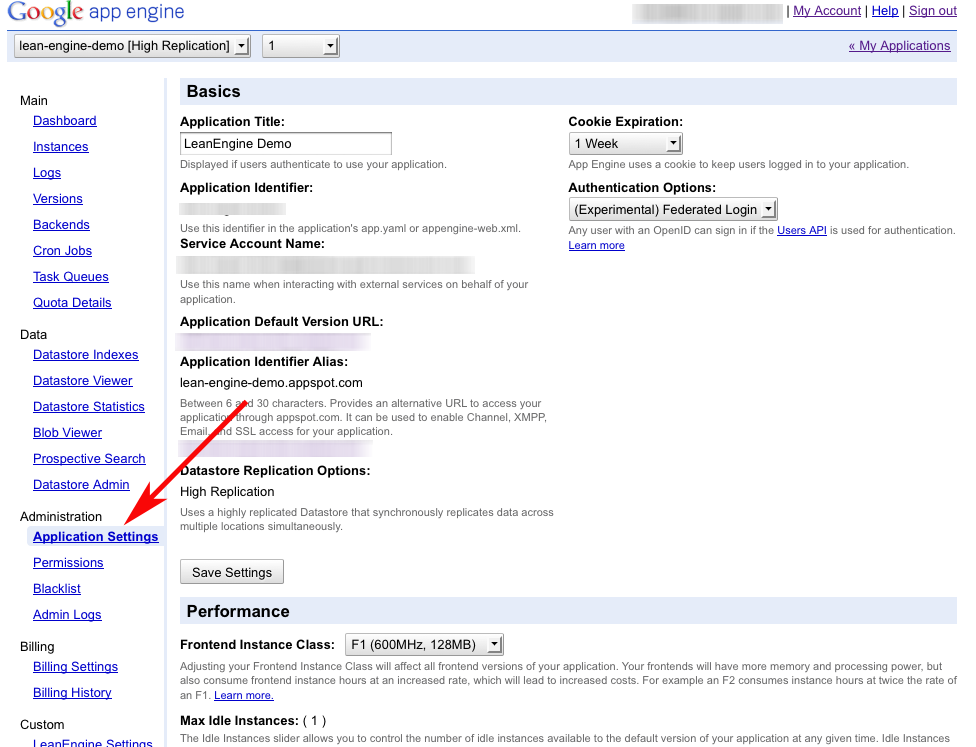
When you have successfully deployed your server there are a few thing you need to set. Login to your GAE administrator console and go to Administration/Application Settings and under Authentication Options choose (Experimental) Federated login.
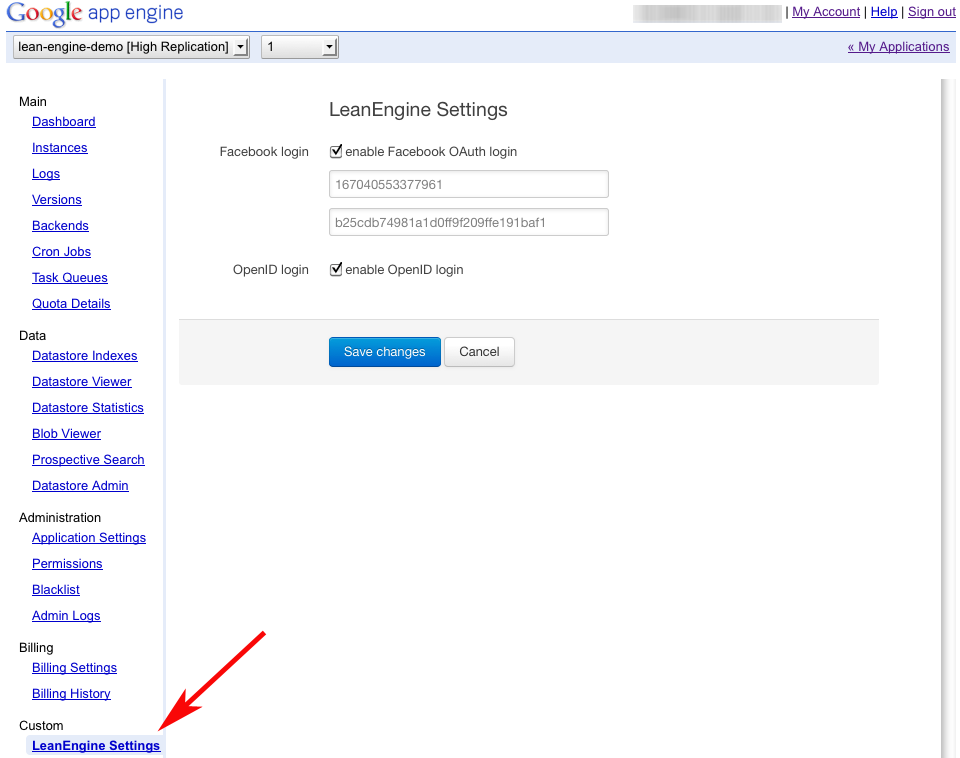
Then you need to go to Custom/LeanEngine Setting and enable the option for Facebook Login and openID login. In case you wish to use FB login you also need to enter your Facebook "secret" here. This is the data you got when you applied for facebook application here.